(Super) Slow Going

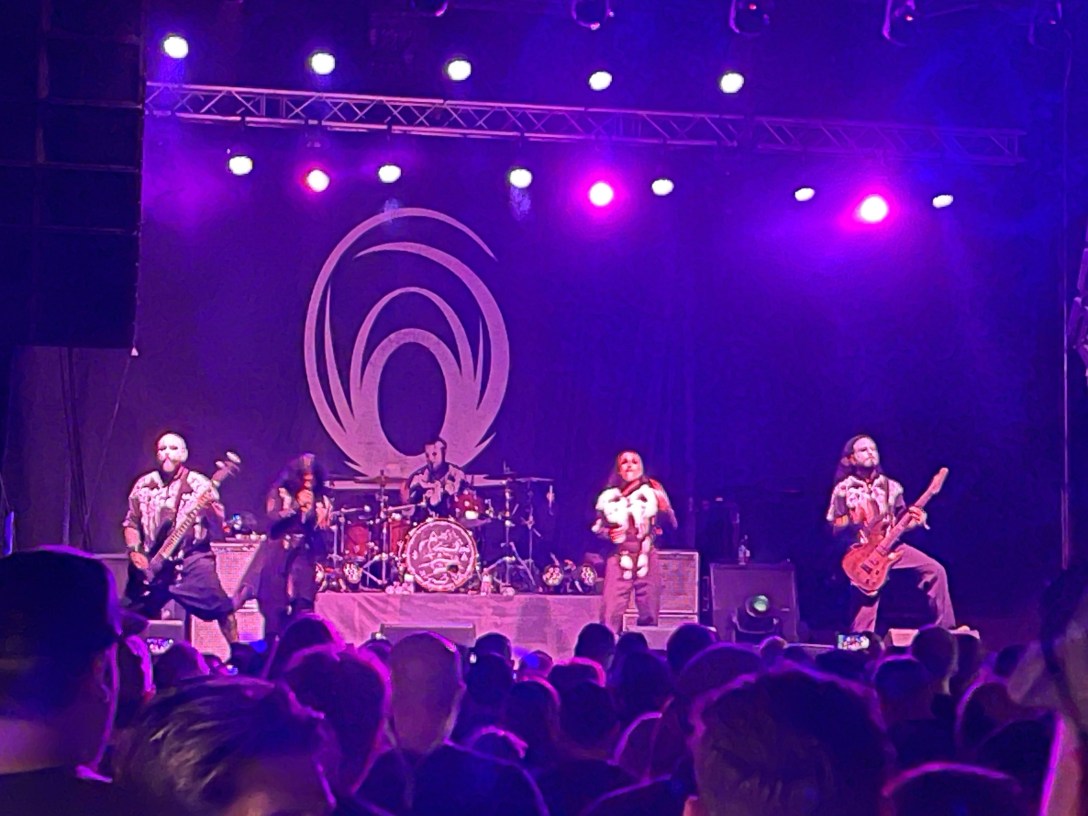
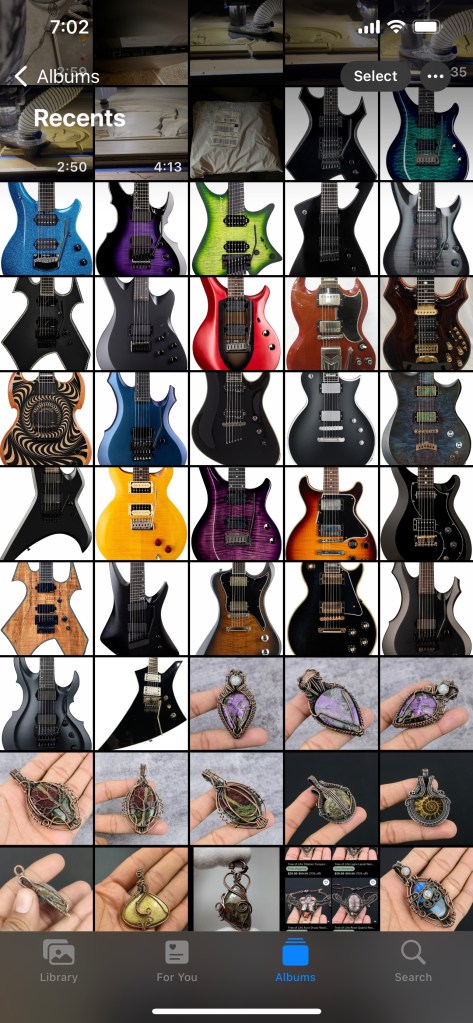
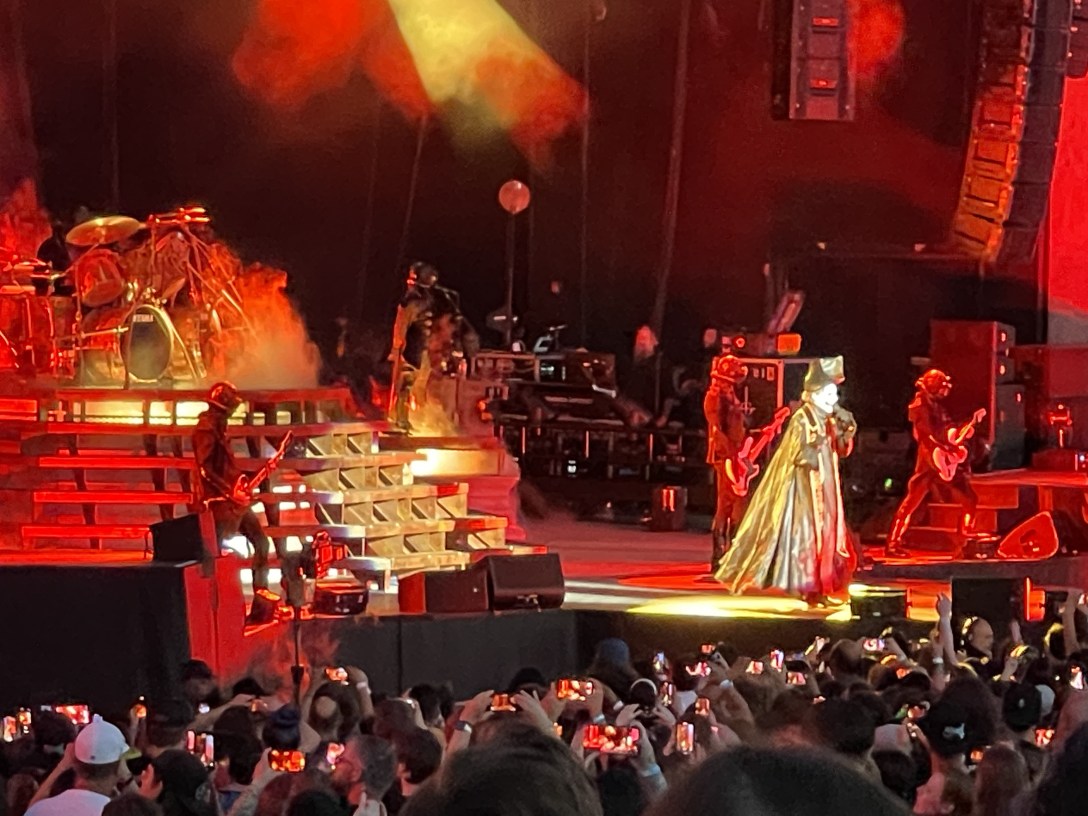
Look, another band for you to identify from another concert I attended. This one is probably much easier to identify because of their very unique costuming. I’ll post the name at the end.

You can follow the journey so far by following these links: Part 1, Part 2, Part 3. I’d also like to point out that I’ve managed to stick to this project for almost 8 months now. I must really like it.

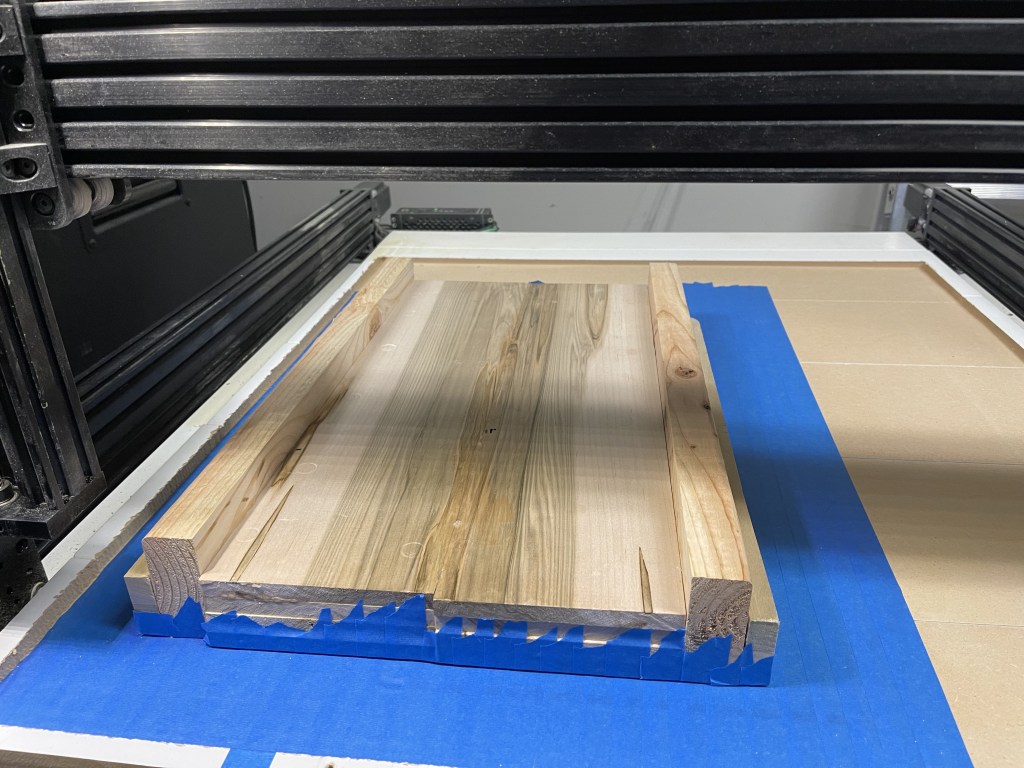
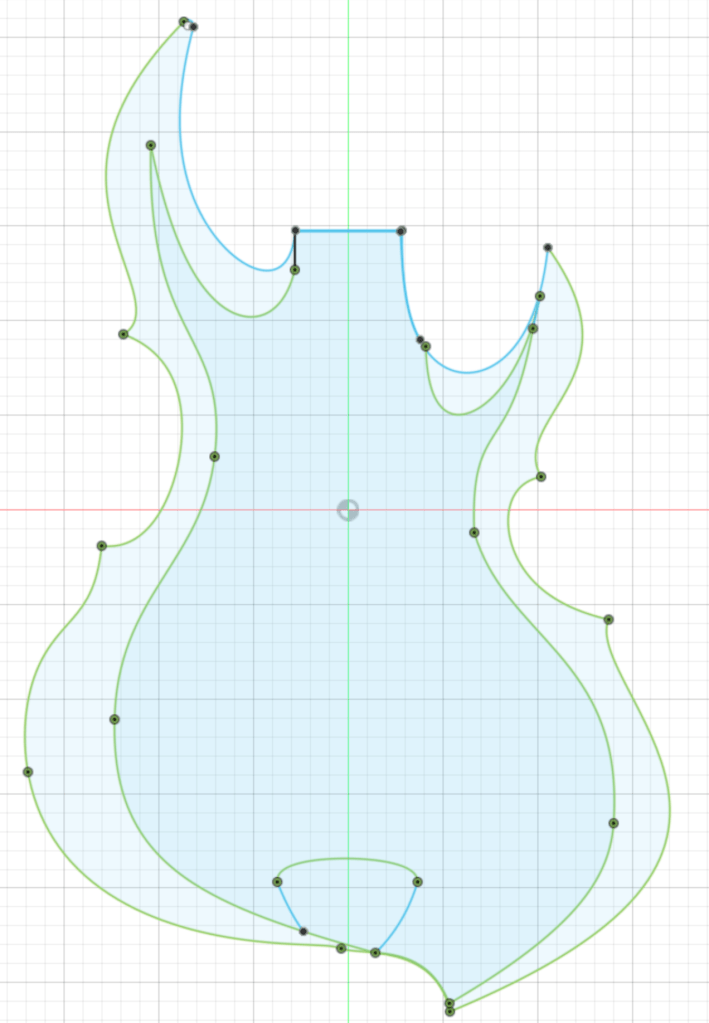
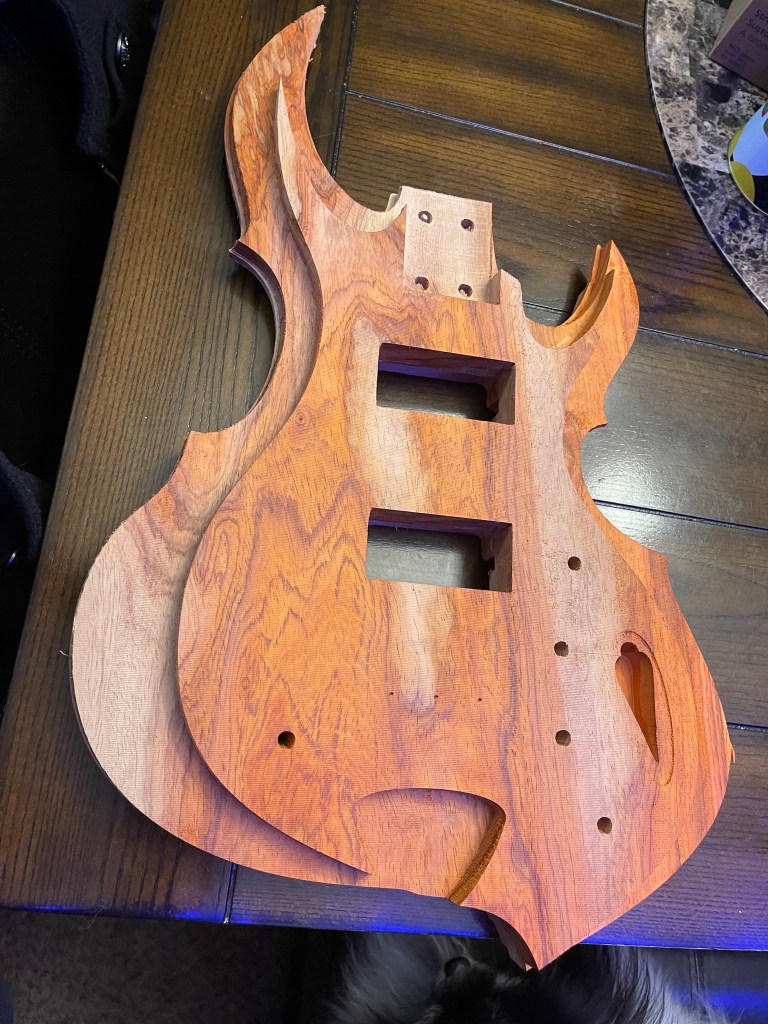
As mentioned in my previous post, I didn’t want to run super agressive cuts because my real stock had cost me so much. Not to mention it has some of the most beautiful figuring I’ve ever seen in wood and I’d never be able to find it’s equal again. This means that it took days for the cnc router to cut it to shape. Looking back now, I totally could have sped it up, but I don’t hate that I took my time.

As a side note, padauk has a super pleasant smell. While doing a surfacing pass, I had the router rotating at a bit too high of a speed and scorched the wood in certain places. It smelt like incense. Slowing down the spindle still produced a pleasant smell. In fact most of the woods I worked with on this project smelled very nice.

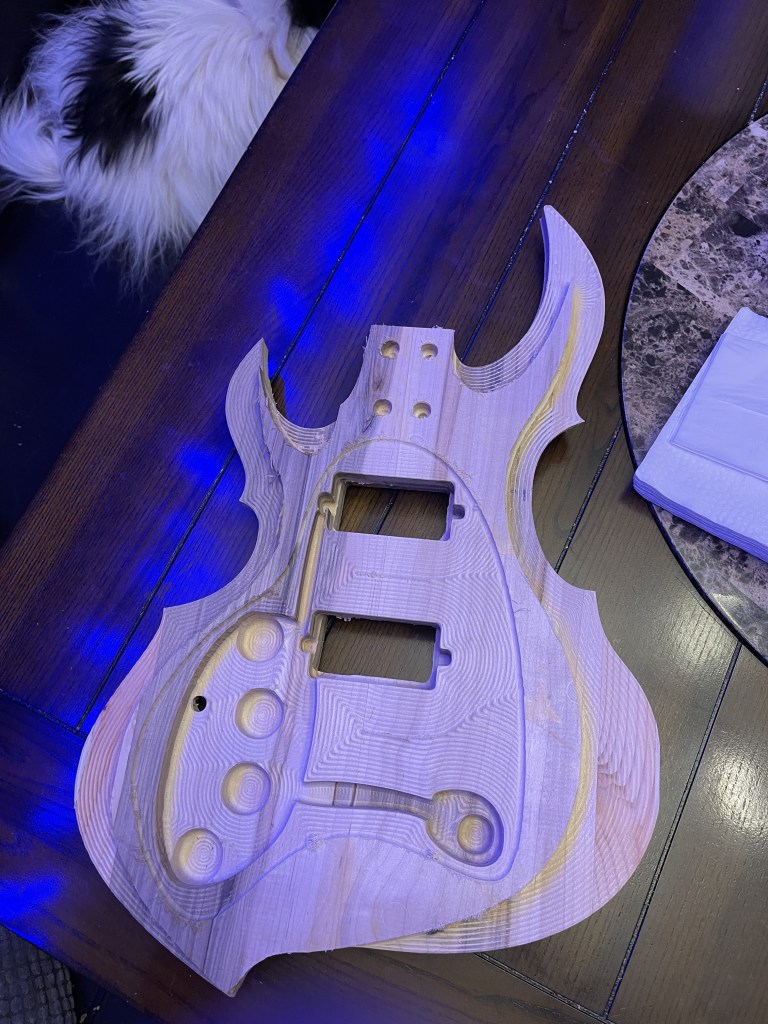
Despite my best attempts I was unable to align both the top and the bottom cuts of the body, so using my new rasp was necissary.

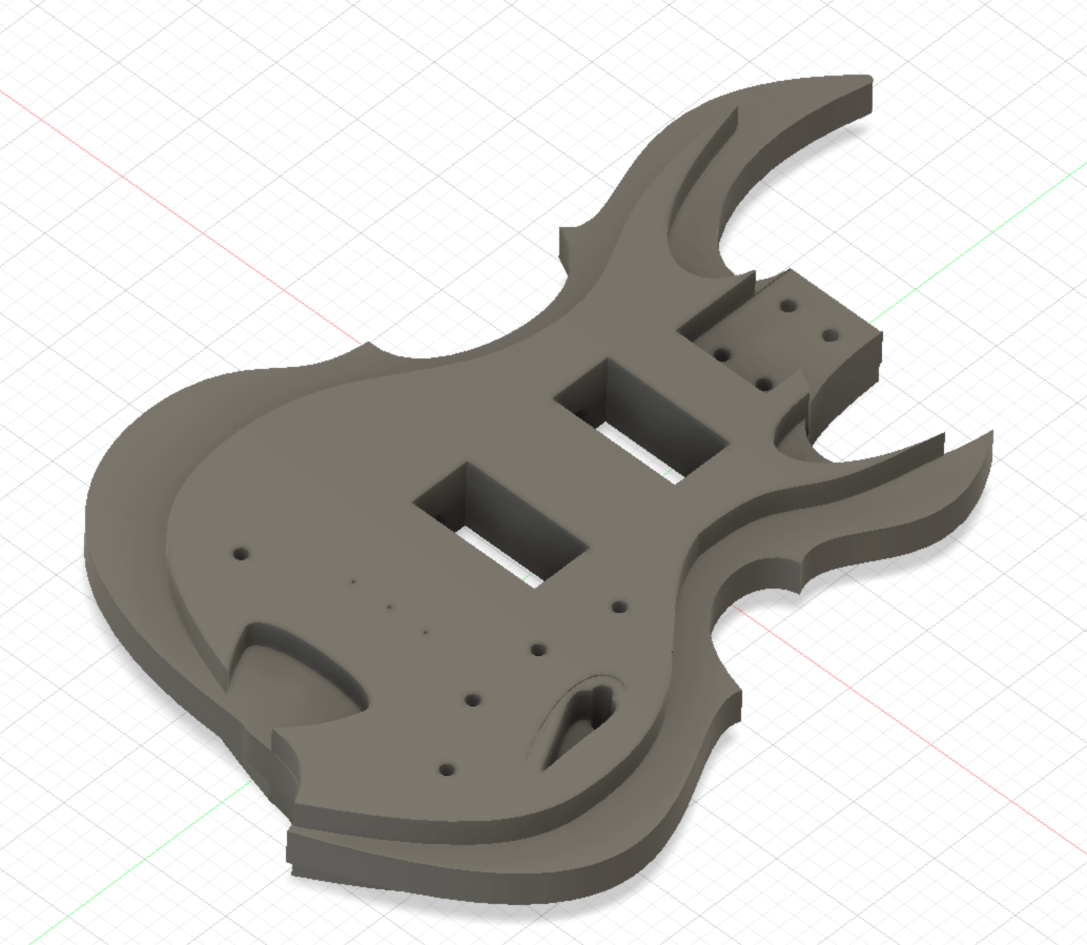
This only took a few minutes, but did change the shape slighly (about 3-4 mm overall) and offset the back and front inner cuts slightly and I had to fix those too. Most specifically, the pickup holes were off a bit and I could not fit the pickups through the holes and I had to spend the rest of the night evening those out.

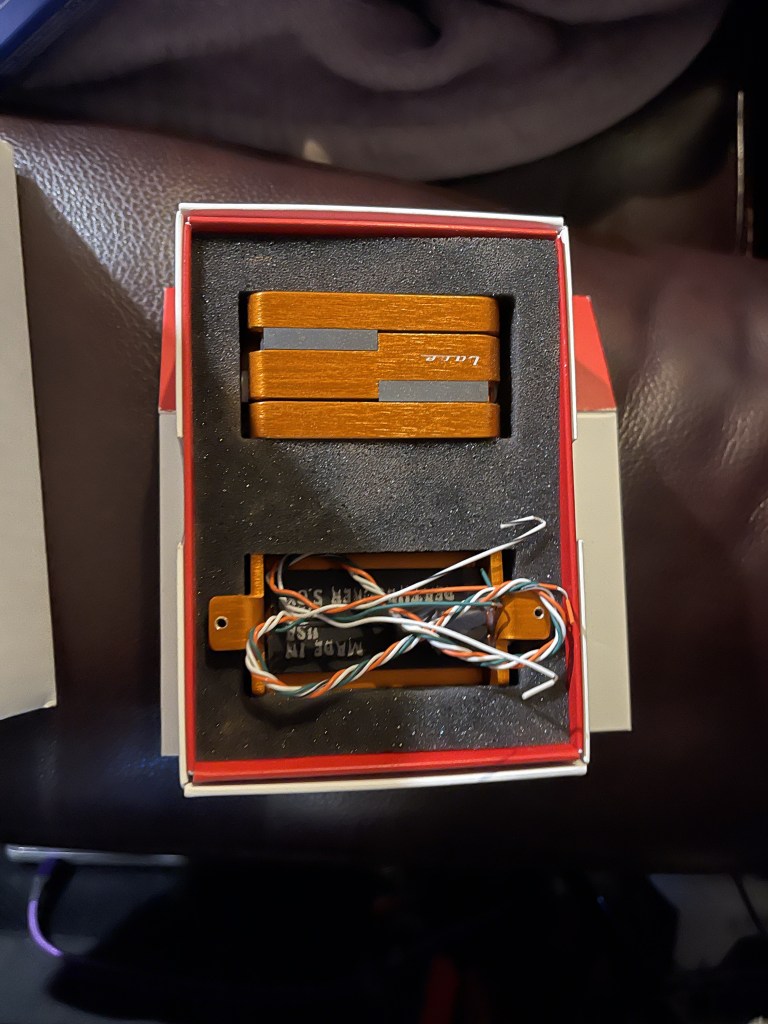
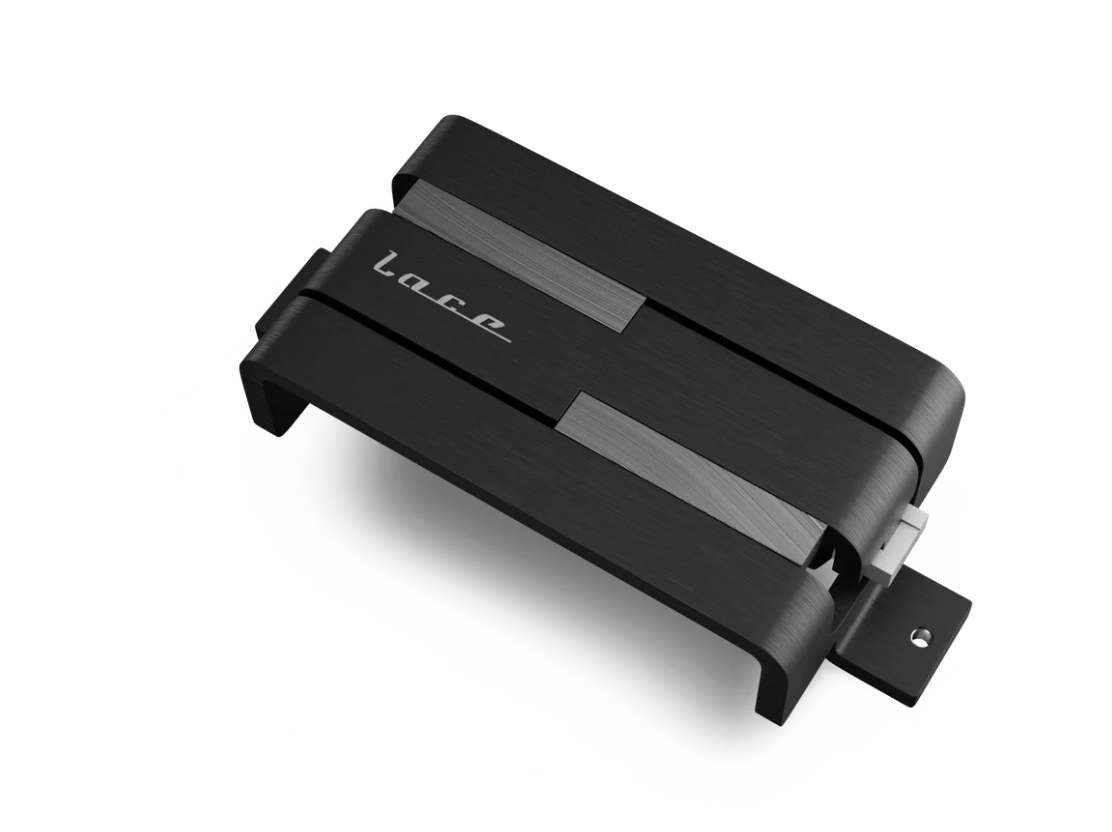
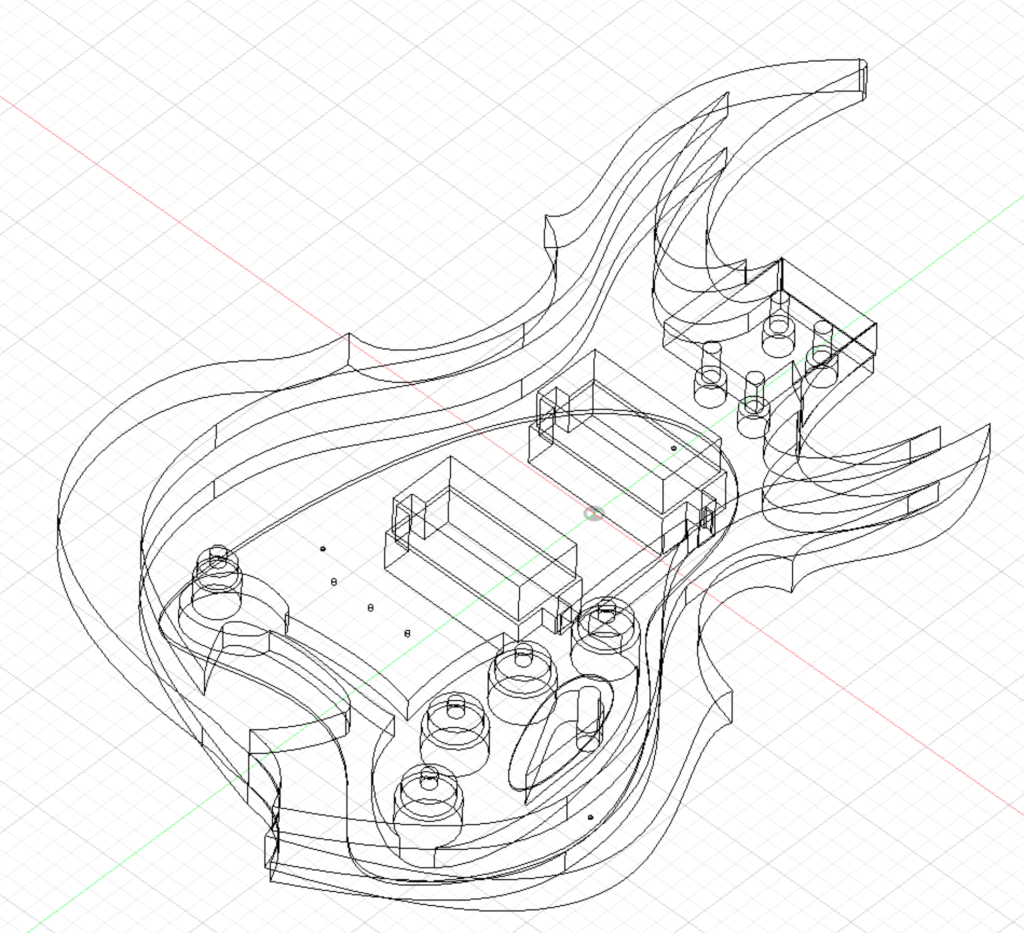
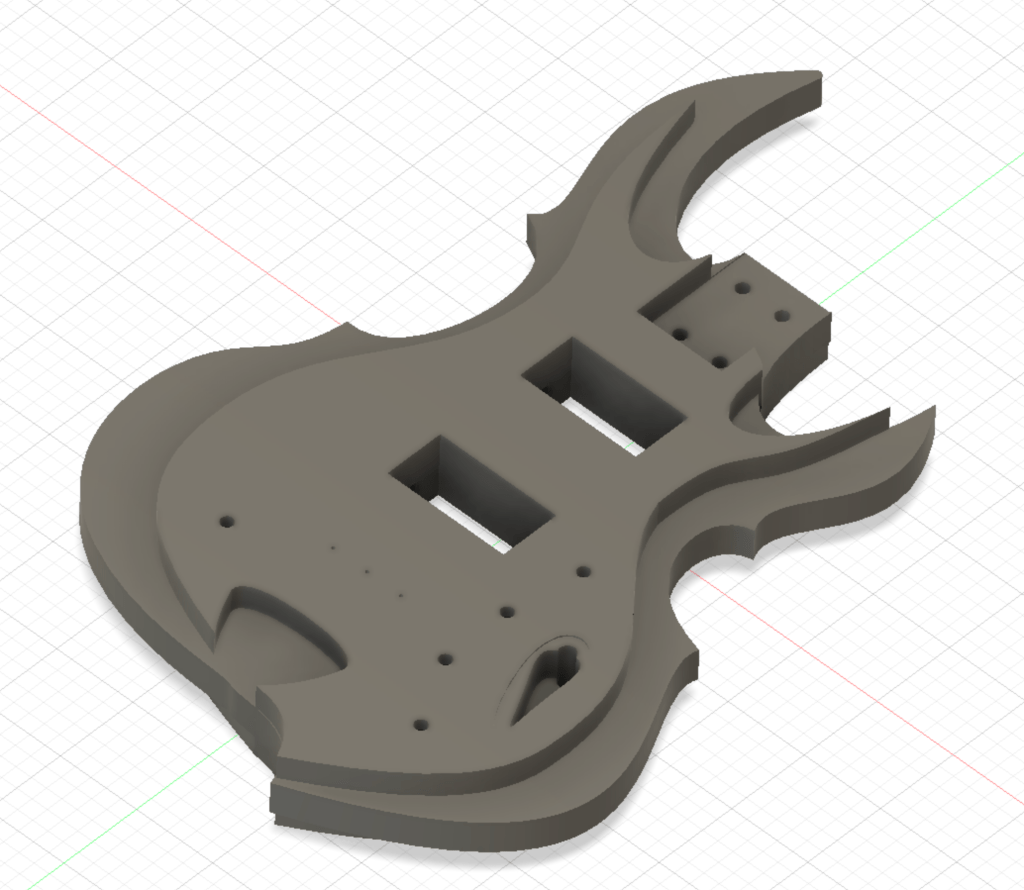
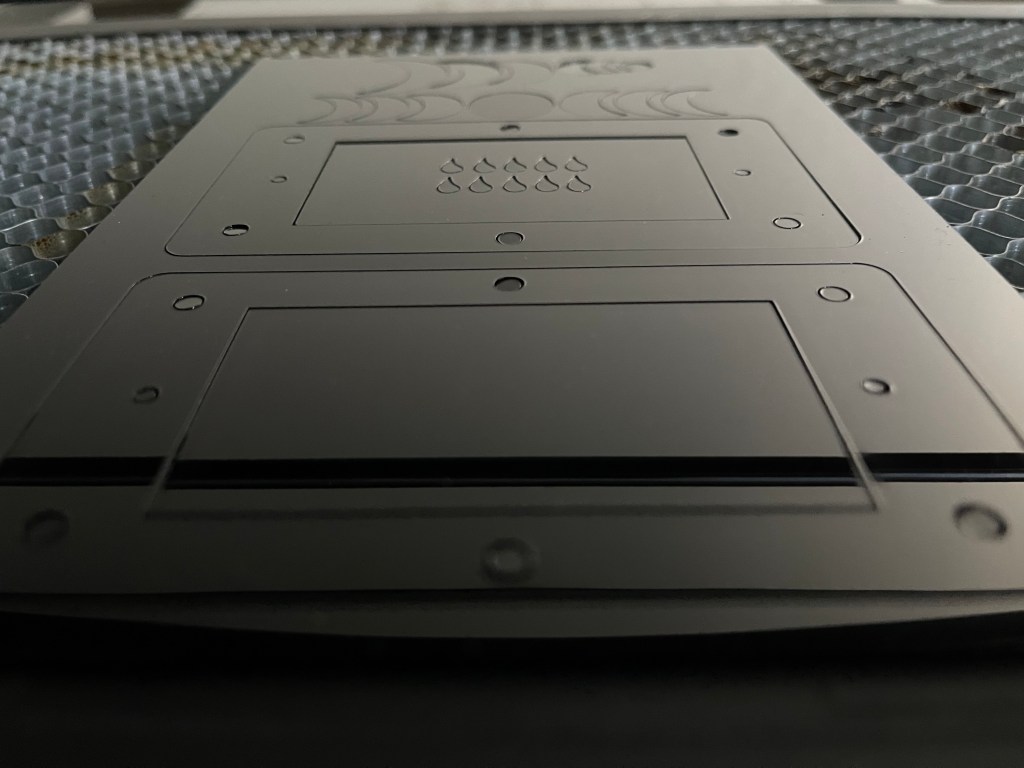
Another quick note about pickups. In most guitars, the pickups are connected to the pickguard and pulled toward it by the mounting screws, not screwed into the body of the guitar and held away from the wood. Unfortunately for me, I believed the second to be the case, and had based my design on being able to screw the pickups to the wood from behind. Once I realized my mistake I tried to quickly pivot and fix the problem and add plates around the pickups, thinking this was the only way to correct it. If I’d have thought a little bit longer I could have realized that I still might have been able to mount the pickups through the wood by thinning out the body in that area and mounted the pickup through the body just like a pickguard. Hindsight, right? Anyway, I designed and laser-cut these plates in black acrylic.

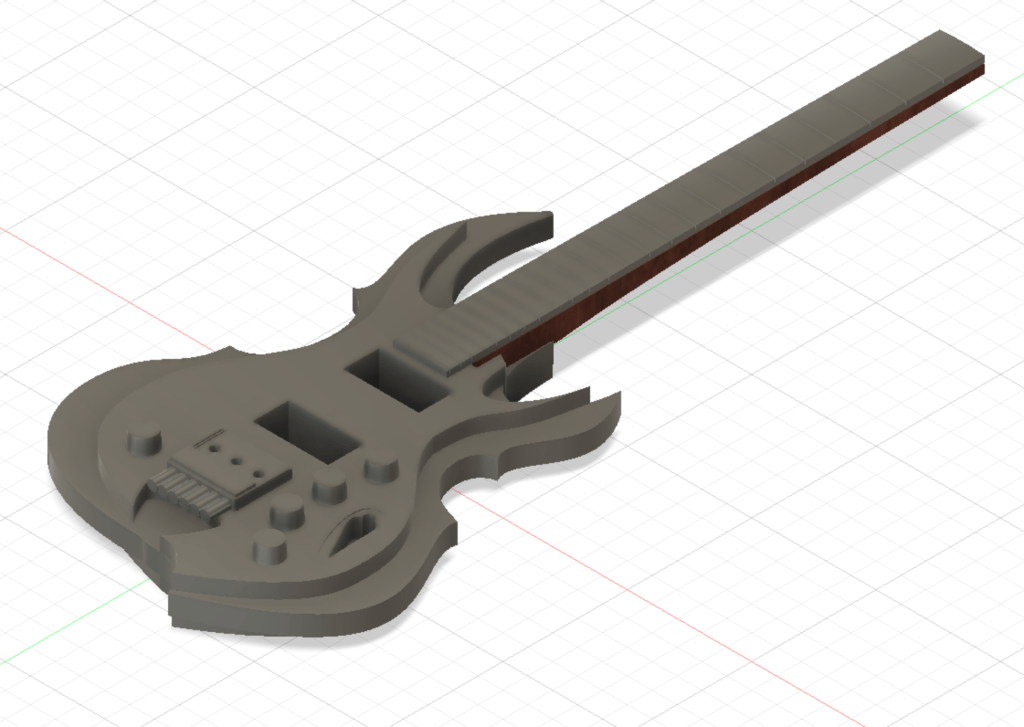
Once the body was done, I began the neck run. The neck wood I had chosen was zebrawood, and again, I had the problem with the top and bottom being offset slightly. Once I rasped the edges flat, the groov for the truss rod was too far left and the rounding of the bottom was too far right.

I had just received my wood carving tools and with them, a draw knife. I’ve never used any of these before, but the draw knife seemed like the perfect tool to even everything out. Short story shorter, it’s not. See, wood will tear along it’s grain if you catch it wrong. And I caught it wrong. In just 3 draws I managed to tear the neck nearly in half. So I had to order more wood. This time I wanted to avoid zebrawood and went with purpleheart.

I ordered two pieces of wood for the neck and once they got here, I got to cutting the first one on the cnc machine. And while that was going, I started in with my carving tools on the body to round out the edges and try to finish up the shaping.

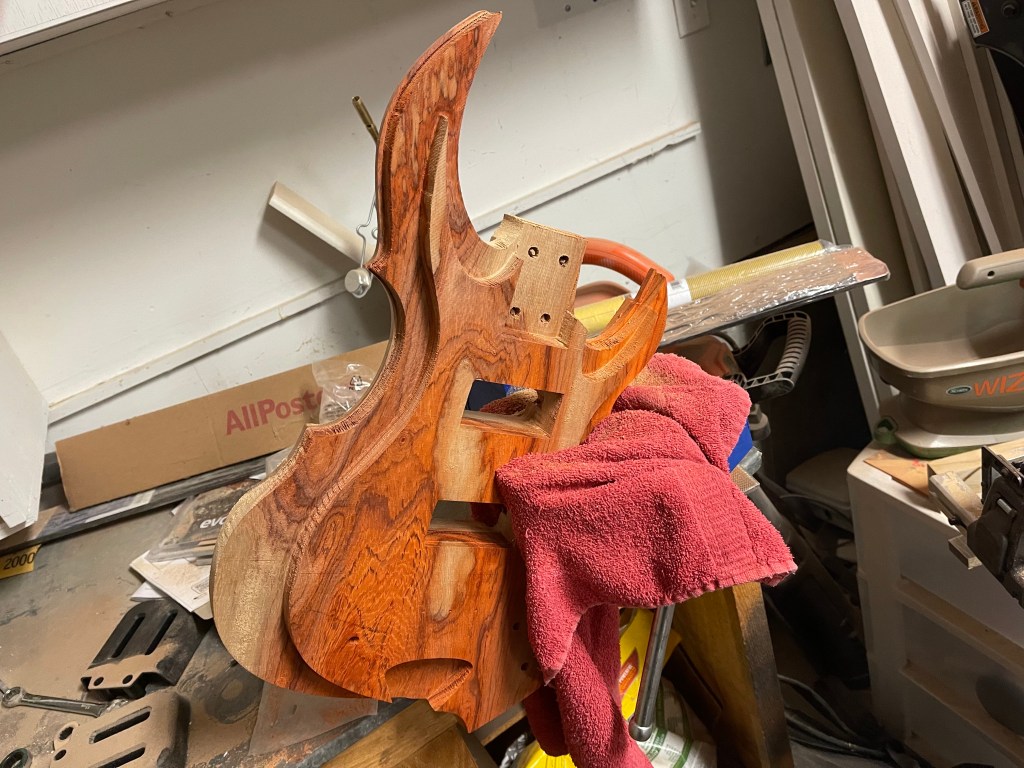
The towel is to try to keep the vice from marking up the wood.

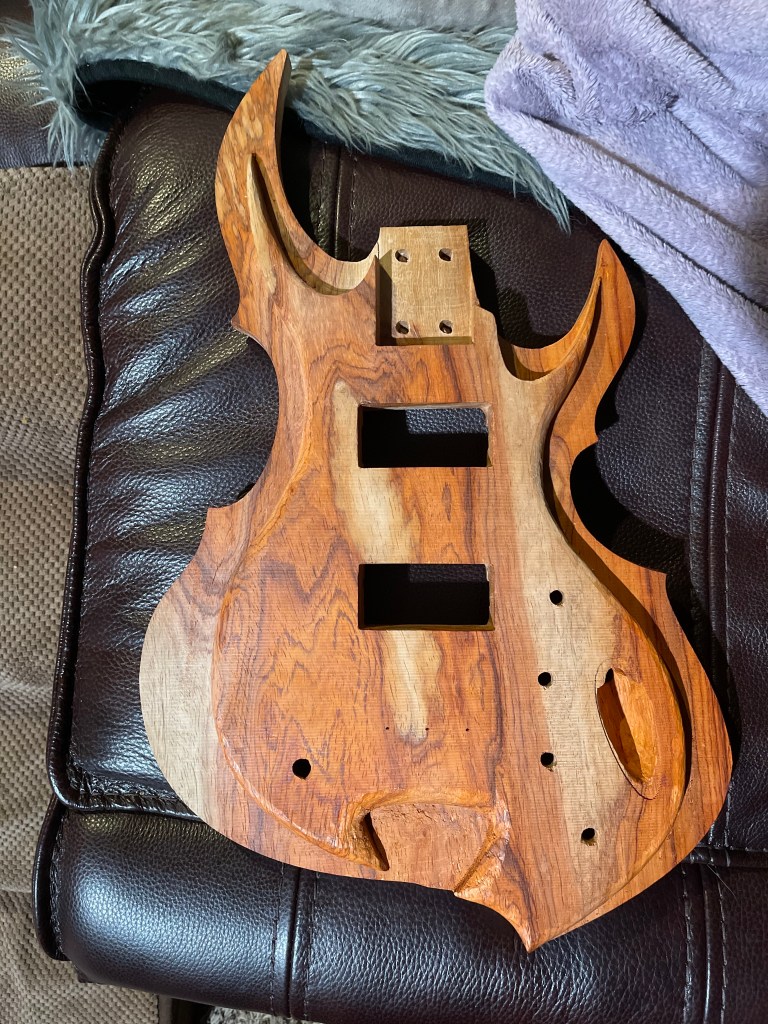
I bet you’re expecting me to give a list of problems I had with the carving tools. Well, the answer is “nothing.” This time I paid attention to the wood grain and how the wood behaved under the gouge and went slowly with short cuts. Things turned out good. I made sure to leave myself enough to finish the shaping with some 80grit sandpaper.

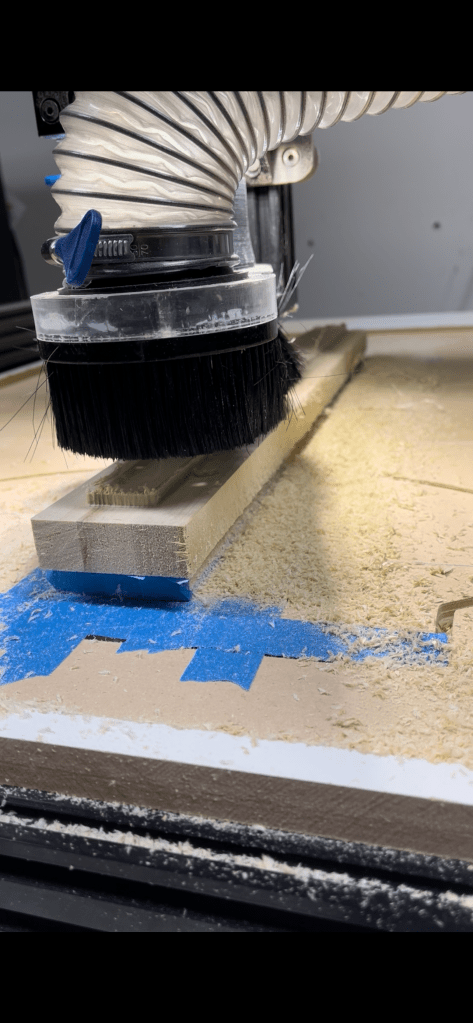
Buuut, while I was carving away, I found out why you needed to have enough masking tape on the table. While cutting the channel for the truss rod, the first neck wood came loose and rode up into the router’s spindle, driving a 5mm groove right through the neck, and then tearing out the side. I tried to figure out how to save it, but the neck was gone. Time to toss this one in the scrap pile to figure out what I can make of it later and start on that last neck.

Finally, this last one came out fine. Slightly offset, but I made sure to leave myself some room for sandpaper corrections. Fretboard, some black walnut, came out fine on the first try too!

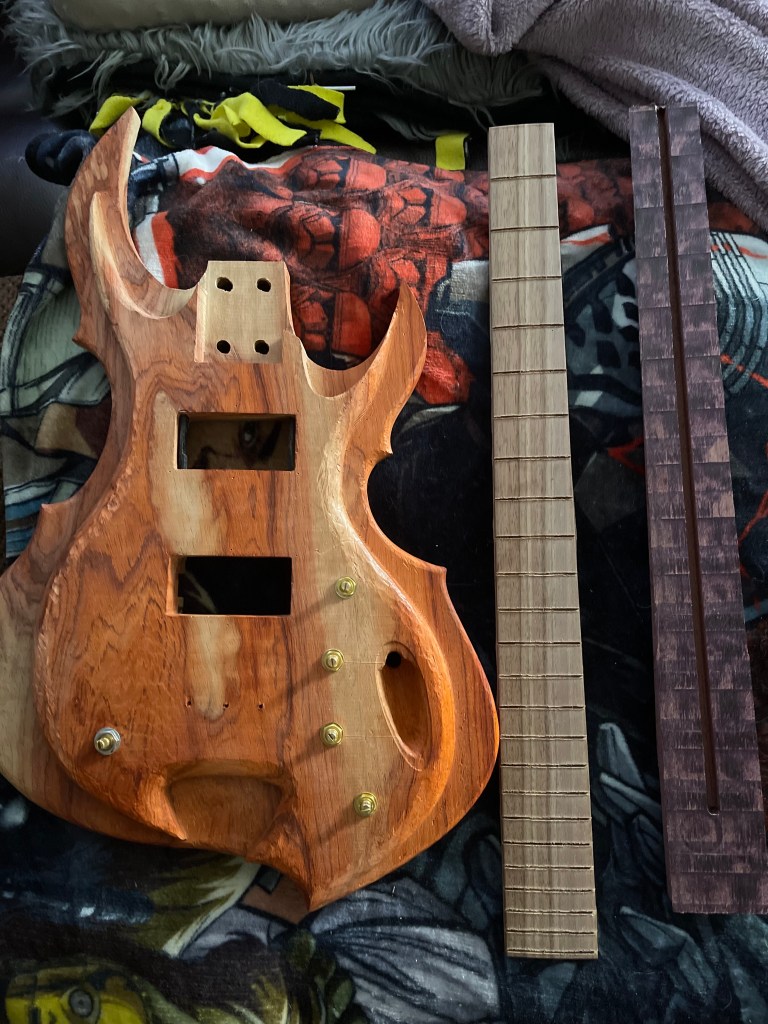
This picture is a little bit early in relation to my story, but it’s the only one I took with all 3 separate parts.

Anyway, I’ll pick up from here in my next post.

And as promised, the band in the featured image is Ghost. The show was very fun; lots of visuals, lots of costumes, lots of loud, and lots of interaction. This was an outdoor show, and the weather leading up to it had been insanely hot (100 degrees plus). Luckily the night before it had rained and during the show it was threatening to rain, so we didn’t die, and the band didn’t die. The music might not be for everyone (with a lot of devilish overtones), and the theatrics might not be for everyone, but I thought it was great. I recommend going to a Ghost show if you get a chance.

Test runs and deliveries

Quick, name the band in the feature image!

You can read the first two posts in this set by following these links: Part 1, Part 2.

So I had my parts ordered. Body wood from Maderas Barber, neck wood from Exotic Wood Zone, the tuner/bridge from hipshot, pickups from lace, and the potentialmeters and capacitors and wiring from amazon. But in the in-between time I wanted to get some tests in to make sure my model was viable and make any small tweaks before running my CNC machine over the expensive woods.

I made a trip down to Lowes and picked up some cheaper wood to work with. A piece of poplar that looked big enough to cut the neck out of and some oak that I could cut & glue into the same size as the body wood I was expecting.As you can see in the picture I kind of suck at estimating sizes and had to add some extra wood to the ends.

I didn’t want to cut too agressively because I wouldn’t dare risk cutting super agressively with the wood I’d actually be using. That meant the cutting took forever. Seriously. 3 or 4 days running from about 9:00 A.M. to 10:00 P.M. First lesson I learned in this test: Getting a good alignment on side 1 and side 2 of a two sided routing is a lot more complex than just squaring up along the bottom of the wood. There were small differences in side 1 and side 2 of the wood along the edge that cause me some frustrations. I decided that in the future I would use dowels in holes drilled through the wood and into the table in the center of the wood to assist in aligning the top & bottom. Still, I was only off by about a milimeter in each direction, something that could be sanded out.

Second lesson, milling only part way on one side and the rest of the way on the other alleviates concerns about collisions between the router and wood. And this is why we do tests before.

It was thrilling to see my model as a physical thing.

Next I ran a test on the neck. This time things were much more frustrating. I tried the dowel in the hole thing, but my holes were not tight enough on the dowel, so there was some sliding as I was setting the part down on the table. Secondly, I had not realized my tram had gone out of square, so as the head moved further back on the table, it was moving more to the right. So when both sides were done, the offset had doubled and left me with a frustrating puzzle to figure out.

If you’re wondering about all the painter’s tape, it’s a trick I learned by watching the openbuilds videos. With a clean surface you put the tape down on your bed, a bit bigger than your stock. Same thing with the underside of the stock. Then you superglue the two sets of tape together. Then you let the glue cure, it only takes a few minutes or so, and you can use accelerant that makes it almost instant. Now you have secured your stock to the table but are able to remove the superglue via tape and have a clean bottom to your wood. But you need to make sure that: 1. You have the tape on the table covering enough area to resist the pressure of your routing bit moving horizontally through the stock; 2. You have enough surface area on the bottom of your stock to hold it down and resist the forces trying to push it around. Nothing in this project has been a problem with that second consideration, but I had a couple of catastrophic failures because of the first one.

While the body was being cut, I received some deliveries, the amazon orders and –

Nice, right? I couldn’t wait to try them out, but since I didn’t really have a way to test them I’d have to. As soon as the body was done, first thing I did was try to sit these puppies in the holes for the pickups aaand, they didn’t fit. The holes on the body were too small, so I had to wait for payday to head down to Lowes and get a rasp. Sandpaper was going to be be ridiculous to clear the holes out.

Anyway, I’m going to end this post there. Because after pulling the body off the cnc router, the long slog of hand shaping the wood began and that’s a whole post of its own.

And the band at the top of the post? It’s Lacuna Coil. I’ve loved their music forever and happened to see that they were going to be playing while I was at another concert (Skinny Puppy, another awesome show if you get a chance to go). So glad I got to see them. Great, loud music, and the show is full of energy. The band hung out outside after the show, chatting with everyone. No stupid extra fee for vip access in an awkward, one sided meeting. They really do seem to love their fans.

Well, type to ya next time.

Window Shopping & model making

Huh, well look at this. It’s only been a little over a week since my last post. That’s, like, a new record for me. Anyway…

Read part 1 here

As I began getting the ideas down for the guitar body, I needed to start figuring out the sizes and shapes for everything so I could fit them in the body. Spoiler alert: I didn’t do a good enough job and some of my assumptions were waaaay off, so I had to do a lot of hand shaping to fit everything after cutting the body, but I’ll get to that later.

First thing I wanted to know was how big could the guitar body be. That would help me finalize the outside dimentions of my guitar body design, and help define what extra bits I could wire up. As I mentioned in my last post, I wanted 2x tone pots, 2x volume pots, 1x blend pot, and 2 humbucker pickups, and it all had to sit so that my wife could use them without being in her way.

I found 4 main sites that carried body blanks that I was interested in purchasing in. The first, StewMac.com, pops up any time you google for guitar making supplies. After looking around for a bit I had a better idea of the names for things I was looking for. A body, neck, and fingerboard (or fretboard) blank. After searching for electric guitar body blank, guitar neck blank, and guitar fingerboard blank, along with StewMac, my second site kept coming up, ExoticWoodZone.com. And after a long night of searching, I came across my third. I can’t remember the details, but they had some beautiful wood and the option to select your specific piece. That site is Maderasbarber.com. Another spoiler: I have since purchased from all of these sites, and was happy with all of them. But note, Maderas Barber is shipping from Spain, and the wood you’re buying can be pretty heavy, so be prepaired for some shipping fees, and be prepaired for some shipping times. My wood was shipped fast via Fed Ex, but stalled out in one Franch depot for about a week and then again in New Jersey for another 4 days. But again, they had some beautiful woods, I was able to pick my specific piece, and the people I had contact with were super friendly, helpful, and quick to get back to me.

Going through these sites, I found that I could count on 20 inches * 14 inches * 1.75 inches. So I created myself a block with these dimensions in Fusion360 to act as a guide and then imported my sketch from Illustrator, trimmed some lines, added some others, and made a few extrusions and I had a base body to work with. I tried a few different ways of chamfering the edges, but but I’m not great at modeling and ultimately decided I would shape the edges by hand.

Next I went looking for pickups. That’s the little boxy thing that sits under the strings and generates the signal that heads out to your amp. Pretty important. At first I thought I could make one myself. After all, they are basically just magnets and coils. About the same as an electric motor, just spread out in a different arrangement. But to get the wire into a nice, clean coil I would need some kind of hardware. I could buy one, but I have never needed to wind a coil myself before, and would probably not need to do so in the future so that wasn’t practical. I could probably 3d print one, but I looked at the designs out there and wasn’t convinced they would be worth the time and frustration. I could try by hand, but thousands of rotations just sounded like an error-prone headache, and thousands of chances to screw up. So shopping I go.

Now I’ll admit, flashy packaging kinda got me this time. While looking for pickups, this one design kept sticking out to me. The Lace Music Alumitone Deathbucker. I mean, it just, just look at it.

After some research and reviews, I decided it might actually be worth trying. There are a few different colors available that will let me compliment the wood I get for the body. So I grabbed the demensions from the page and tried to model it into the guitar body. I didn’t want to use any pick guards so that I could show off more of the wood, so I had to cut through the back of the guitar to install everything. That was fun (note the sarcasm).

To work on something easy, I went looking for pots (potentiometers, aka the knobby things). For this I just picked some up on amazon.com along with some knobs that I knew my wife would like. Then I grabbed the dimensions and started putting them into my model.

Now when I say I added something to my model, I mean that I created a rough shape fitting the part and used it to cut out part of the body model. But when I got to adding the pots, I began having problems with grabbing just the parts I wanted and moving them, and if I made a change to one pot I had to keep going back to the others to make the same change. This is where I went back and created a new model file for each item and then imported them into the body model so that when I needed to change a piece, I could change it in its file (complete with change history) and then just update the reference in the body. They were still just simple roughs of the shapes, but I could quickly update them to add detail or change something else and basically leave the body alone.

Other than the neck and fingerboard, I was almost roughly done with the model for the body. But I’d need to model the neck too to know what to do with the body, so I leave that for later.

But I did need to figure out how to suspend the strings. This normally involves a tailpiece to secury the strings at the body, a bridge to align the strings and lift them over the pickups and high enough to clear the frets, as well as terminate the vibration wave at the body end, the knut to align the head section of the strings and end the vibration wave at the head end, the head to hold the tuning machines, and the tuning machines that wrap the string around them to pull them tight and hold them in tune. But I found a cool way around this. A headless bridge!

The way a headless bridge works is that the strings at the head are secured in place with a sort of non-adjustable knut, and the body end of the strings go over a saddle, just like a normal bridge, but then connect to a tightening machine that is mounted horizontally instead of vertically. Instead of reaching for the head to turn a machine to tune your guitar, you reach down behind where you normally strum and twist a knob to tune your guitar. Now, I have to admit, this was going to be more expensive. Probably the most expensive piece of the whole guitar. But the whole point of this guitar was to be a gift for my wife, to be unique, and to be damn cool. Not to build a cheap guitar. So I grabbed the dimensions on the site and created a model.

Lastly, I wanted a Fender style jack that plugged into the front of the guitar. That was fairly easy to find, but the dimensions were not. So I had to look for references in the images, like the length of a plug, a finger, whatever, and create a rough model as a placeholder. Caps (capacitors) were the only thing left to find, but I could wait until I was buying to figure those out because they weren’t going to take up more space in the body.

I now had a better idea of what the body was going to look like, where things needed to go, and about how big it was going to be. I knew that I needed to at least get some kind of wood shaping hand tools, and my mill bits needed to be able to clear about 1.5-2 inches. Christmas was getting close and I needed to get working. I figured I needed at least 2 weeks to get everything done.

Bwahahaha. I was so wrong.

A 4+ month late Christmas present

As I mentioned in my last post (way back) I decided to make an electric guitar for my wife. For a ton of reasons, it’s taken me much, much longer to finish than I expected, and it’s taken way longer than it should have. But I am now approaching the end, and wanted to start a set of posts to document all that I went through.

When first deciding to make the guitar, I was pretty ignorant to the work I was taking on. None of it was necissarily hard, but some of it was time consuming, some was frustrating, and all of it was something new I had to learn. I didn’t even really have a solid idea of the shape I wanted. All I was really sure of is that the neck had to be comfortable for my wife and the guitar had to be cool. Cool sound, cool wood, cool shapes.

I did some initial research on the size of a guitar body and found a few places that sell body blanks, a slab of wood, usually around 21x15x2 inches with some variation for specific situations. Once I had a size to work with I hopped into Adobe Illustrator to start messing around with some shapes. After a bit of getting a feel for the size, I headed over to Etsy to see about picking up some svg files in the shape of some critters I knew would fit her tastes.

First, I bought some bat svg files, and tried throwing a guitar body together with that, intending to make it look like bats flying in front of the moon. I pretty quickly abandoned this failure:

Design with bats silhouetted against a circle

Maybe I’ll come back to that later and make it better with a future project.

So, my second attempt was to try to turn a shape more like a squid into a guitar. Cephalopods are my wife’s favorite creatures, so back to Etsy I went to get a svg or two of squid and octopus designs. After a week of working on the design and disliking where it headed each time, I gave up on the animal based design idea altogether. I disliked the designs so much I don’t even have a copy left on my computer!

Feeling bummed after having spent most of my November just trying to come up with an idea, I began looking at guitar designs for inspiration. There are so many sweet looking guitars that I had to just start taking screenshots to remember the shapes.

After having seen this latest season of Stranger Things, my wife has been all about Eddie Munson, and I hovered over the B.C. Rich Warlock guitar design. (I grabbed this picture from musician’s friend’s listing. I’d have just linked to it, but I hate when my images go dead because they change their url style or whatever.)

B.C. Rich Electric Guitar

But there was another guitar that caught my eye. The ESP E-II FRX. It looked sharp and soft, dangerous and beautiful at the same time. So I set that up as my background and began throwing curves over top of it.

I didn’t want to rip it off exactly, so I let my curves go wide, moved some here, some there. I knew I wanted tone and volume control for each pickup, so I designed mine for 4 nobs along the bottom edge. And though the ESP doesn’t have a switch, I wanted to let my wife play around with the tones between the pickups, but didn’t want to put a switch in. So I designed mine with one more nob on the top edge and tried to put it back far enough to keep it out of the way when she’s strumming. The initial design of the guitar body took me a good 100 hours or more. Some of that was trying to figure out how to do something I wanted to do, some of that was designing dummy plugs to design as cutouts in the body. And a lot of it was fighting with curve handles that wanted to jump all over the place without warning.

Despite my changes, though, you can definately see the inspiration. All of the design from here on out is done in Fusion360 (with one minor exception a ways down the line).

Cad Drawing of guitar
Wireframe cad rendering of guitar
Shaded Cad rendering of guitar

Next, it’s time to start doing some window shopping and research.